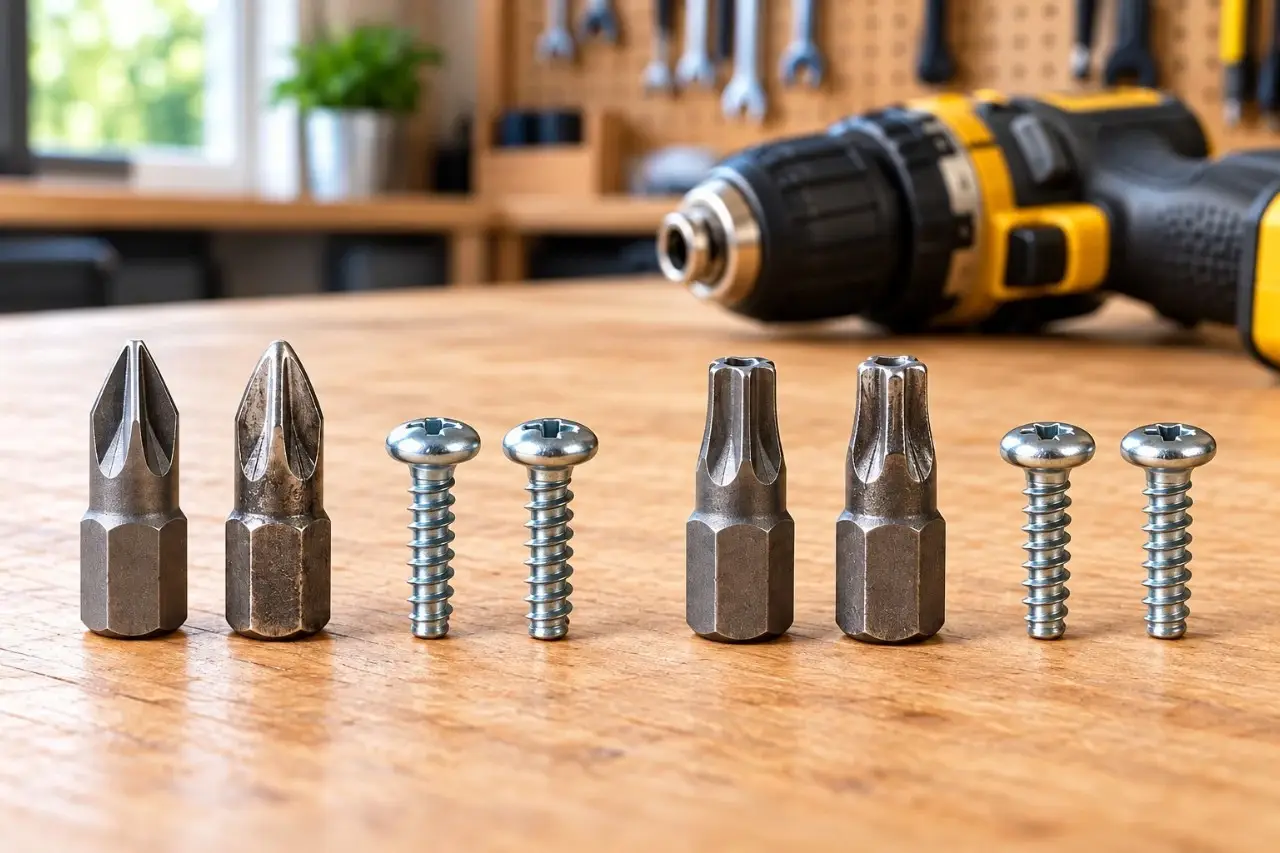
A worn driver bit usually gives warning before it fails completely. The clearest signs of worn driver bits are rounded or deformed tip edges, a loose fit in a matching screw recess, repeated cam-out, chips or cracks, heat discoloration near the working end, increasing damage to screw heads, and the need for unusually high forward pressure.
Replace the bit when it no longer seats securely or drives an undamaged matching fastener with consistent control.
Why driver bits wear out
Driver bits transfer torque through a very small contact area inside the screw head. Every time the bit drives or removes a fastener, the working surfaces are loaded against the recess.
Fit matters. A wrong-size, wrong-style, or worn bit contacts the recess poorly, increasing stress and making slipping more likely.
Impact drivers add repeated torsional shock as resistance increases. That is why manufacturers sell impact-rated bits with torsion zones and other features intended to tolerate impact-driver loads. If you are unsure which tool is appropriate for a fastening job, see Ulverion’s guide to the difference between a drill/driver and an impact driver.
Heat can also appear when a bit repeatedly slips or is used under heavy load. Heat tint or a highly polished tip is useful as a warning sign, but color alone does not prove that the steel has lost hardness. Judge it together with fit, visible damage, and driving performance.
Bit life varies with fastener type, material, torque, alignment, duty cycle, and fit.
7 signs a driver bit is worn out
1. The tip edges are rounded or visibly deformed
Inspect the working end under good light. On a serviceable Phillips, square, Torx, or hex bit, the contact surfaces should still have clearly defined geometry.
Wear often appears as smooth, rounded, mushroomed, or shiny edges at the places that contact the screw. Even modest deformation reduces the area that can carry torque.
If you are unsure, compare the bit with a new one of the same type and size. A worn bit may still turn a loose screw but slip as soon as resistance increases.
2. The bit rocks in a clean, matching screw head
Seat the bit by hand in a new or undamaged fastener of the correct drive style and size. It should enter to the intended depth and feel stable.
A small amount of movement can be normal. The concern is obvious rocking, poor depth of engagement, or a fit noticeably looser than a new bit of the same size.
First confirm that the drive system really matches. A Phillips #2 bit is not a universal choice for every cross-shaped recess. Phillips and Pozidriv, for example, are separate drive systems and should be matched with their corresponding tools.
3. The bit keeps camming out
Cam-out happens when the bit climbs out of the screw recess while torque is being applied. You may feel a sudden skip, hear a sharp pop, or see fresh marks around the recess.
One cam-out event does not prove wear; an incorrect bit, angled tool, shallow seating, or fastener problem can cause the same symptom. Repeated cam-out with a clean, correctly matched fastener is a strong reason to replace the bit. Do not compensate by simply squeezing the trigger harder.
4. The bit is chipped, cracked, or twisted
Any visible crack, missing section, or chipped working edge is enough reason to remove the bit from service.
A chip reduces full contact with the screw, while a visibly twisted tip or shank indicates overload. Do not straighten a twisted bit or save a cracked bit for “light-duty” work.
5. The working end shows heat tint or abnormal polishing
Blue, brown, or straw-colored tint near the tip can indicate that the bit experienced significant heat. Repeated slip is one possible source because friction occurs at the bit-to-fastener interface.
A shiny tip by itself is not necessarily worn out. Normal contact can polish tool steel. Replace the bit when discoloration or heavy polishing appears together with rounded geometry, poor fit, repeated slipping, or other damage.
If several bits discolor quickly, check drive size, alignment, pilot-hole requirements, tool choice, and technique.
6. Good screw heads start stripping more often
When several new fasteners begin showing damaged recesses, inspect the bit before blaming the screws.
Test the suspect bit in an unused screw of the same type. If a fresh matching bit fits noticeably better and drives normally, retire the worn one.
If a screw is already damaged, switch to a fresh exact-match bit before trying to remove it. Ulverion’s guide to removing stripped screws without making the damage worse explains when to stop driving and move to a different removal method.
7. You need excessive pressure to keep the bit engaged
A correctly matched, serviceable bit should stay engaged with controlled forward pressure while the tool is kept in line with the screw.
If you have to lean heavily into the tool to prevent slipping, stop and inspect the setup. High required force can also come from the fastener or material, such as a long screw in dense wood that needs a pilot hole.
A useful comparison is to try a new bit of the same type and size in the same setup. If the new bit engages securely and the old one does not, the old bit has reached the end of its useful life.
How to inspect a driver bit before use
Before changing or inspecting a bit, turn the tool off and disconnect its power source. For a cordless tool, remove the battery pack; for a corded tool, unplug it. Follow the tool manufacturer’s instructions if it specifies an additional lock-off procedure.
Then use this quick check:
- Confirm the drive style and size. Match Phillips, square, Torx, hex, slotted, Pozidriv, or another specified recess exactly.
- Inspect the tip. Look for rounded corners, chips, cracks, deformation, twisting, or concentrated heat tint.
- Test the fit by hand. Seat the bit in a new or undamaged matching fastener and check that it reaches proper depth without pronounced rocking.
- Check the holder interface. Inspect the shank for damage and make sure the bit is fully retained in the chuck, bit holder, or impact-driver collet before use.
- Wear eye protection. Small bits and fastener fragments can become projectiles if an accessory fails.

Worn bit or another driving problem?
Replacing a worn bit is sensible, but it will not fix every fastening problem. Use the symptom to check the entire setup.
| What you notice | Possible cause | Practical response |
|---|---|---|
| Bit slips immediately in a new screw | Wrong drive style or size | Match the bit precisely to the screw recess |
| Bit slips only after load increases | Worn bit, poor alignment, or incomplete seating | Inspect the bit and keep the tool square to the fastener |
| Screw stalls in hardwood | Pilot hole issue, fastener mismatch, knot, or excessive resistance | Stop and check the fastener plan before adding more torque |
| Bit and screw become unusually hot | Repeated slipping, heavy load, or extended duty cycle | Stop, let parts cool, and correct the underlying cause |
| Bit chips or breaks in an impact driver | Overload or unsuitable accessory | Use a bit specifically rated by its manufacturer for impact-driver use |
| Screw recess strips repeatedly | Worn/wrong bit, excessive torque, or poor seating | Replace the bit, confirm fit, and reduce driving force as needed |
For wood screws, pilot-hole size depends on screw geometry, material, and manufacturer guidance. There is no universal pilot-hole diameter for every fastener. Ulverion’s guide to preventing wood splitting when drilling explains when predrilling is useful and why the correct size varies.
Habits that help driver bits last longer
Use the exact bit that fits the fastener; do not treat an undersized or worn tip as a close-enough substitute.
Keep the tool aligned with the fastener axis. Start slowly enough to establish stable engagement, then increase speed only as the task requires. On a drill/driver, use an appropriate clutch setting for controlled fastening rather than relying on maximum torque for every screw.
With an impact driver, use driver bits and holders specifically rated for impact use. Impact-rated designs are made to tolerate repeated torque peaks that can be harder on standard accessories.


Store bits so their working ends are protected and their sizes stay easy to identify. Loose bits mixed with screws, drill bits, and other metal parts can become dirty or damaged. A labeled bit case or divided organizer also makes it easier to retire worn bits instead of accidentally returning them to service. For broader storage ideas, see Ulverion’s guide to organizing power tools and accessories.
Wear safety glasses when driving fasteners, especially overhead or close to your face. Keep a stable stance, support the work, and stop if the bit begins slipping repeatedly.
Replace a driver bit when fit becomes inconsistent, the working geometry is visibly damaged, or a new matching bit clearly performs better. That is usually cheaper and easier than repairing a stripped screw later.

Ulverion is reader-supported. Your support allows us to research tools, create practical guides, and share reliable DIY advice for homeowners, makers, and workshop enthusiasts.