An oscillating multi-tool can make controlled plunge cuts in drywall, trim, flooring, and other tight spaces where a larger saw is impractical.
But it is also easy to overheat a blade, scar a finished surface, or make a cut take far longer than it should.
Most common oscillating tool mistakes come down to choosing the wrong accessory, applying too much pressure, ignoring material limits, or expecting the tool to replace every type of saw.
Common Oscillating Tool Mistakes That Ruin Results
1. Using one blade for every material
| Preview | Product | Price | |
|---|---|---|---|

| CONNOO 158 Pack Oscillating Saw Blades, Oscillating Tool Blades with Sandpaper, Multitool… |
$28.97
$24.62 | View on Amazon |
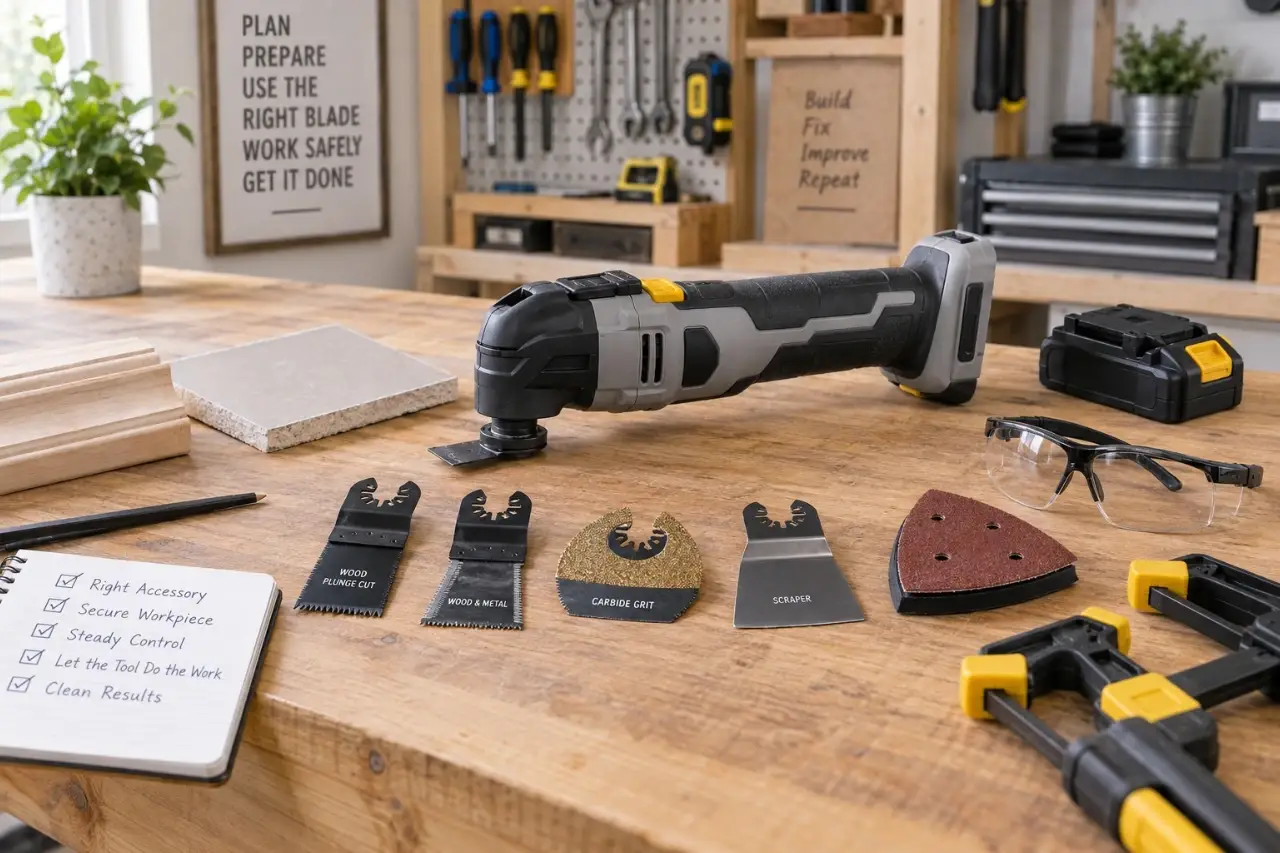
A multi-tool blade that cuts pine trim reasonably well may struggle badly with a deck screw, cement board, or grout. Blade teeth, coatings, and edge types are made for specific jobs. A wood blade has aggressive teeth for quick cuts in lumber and drywall. A blade marked for wood and metal can handle occasional nails or screws, although it will still cut wood more slowly than a dedicated wood blade.
For grout, mortar, tile adhesive, or cement-based materials, use a carbide-grit or diamond-grit accessory approved for that task. For scraping caulk, paint, flooring adhesive, or thinset residue, use a rigid or flexible scraper blade as appropriate. Trying to cut masonry material with a toothed steel blade dulls it quickly and can create unnecessary heat.
Read both the tool manual and accessory packaging before installation. The mounting pattern, maximum speed, and permitted applications can vary by manufacturer. Do not force an accessory onto a mount that does not match it.
2. Pushing hard instead of letting the blade cut
An oscillating tool moves its accessory through a very small arc at high speed. It does not remove material the way a circular saw does, and heavy pressure rarely makes it cut faster. More often, it stalls the blade against the work, builds heat, and wears the teeth or abrasive edge prematurely.
Start with light, controlled pressure. Let the blade establish a shallow kerf, which is the narrow slot created by the cut. Then maintain steady contact and make small adjustments rather than leaning on the tool.
If the blade is barely progressing, stop and diagnose the problem. You may be cutting a hidden fastener, using a dull blade, running too slowly, or asking the accessory to cut material it was not designed for. More force is usually not the fix.
3. Starting at maximum speed for every job
High speed is useful for many wood cuts, but it is not automatically the right setting. Maximum speed can melt certain plastics, scorch wood, fling dust, and make sanding difficult to control. Lower or middle settings often give better results when working near finished surfaces or with materials that heat easily.
Use the tool’s speed dial as a control, not a permanent setting. Begin at a moderate speed when you are unsure. Increase only if the blade is cutting efficiently and the workpiece is not overheating. Reduce speed if plastic begins to soften, paint smears, sanding scratches become hard to manage, or vibration makes the cut wander.
The correct setting depends on the accessory, material, and tool model. Manufacturer instructions take priority over general guidance.
4. Making plunge cuts without checking behind the surface
Plunge cuts are one reason multi-tools are so useful. You can cut an opening in drywall, remove a small section of flooring, or trim a door jamb close to the floor. They also create a serious risk: the surface may conceal wiring, plumbing, ducts, fasteners, or other components.
Before cutting into a wall, floor, or cabinet panel, determine what may be behind it. Turn off power to the affected area when appropriate, but remember that a switched-off circuit does not remove every possible hazard. Do not proceed if you cannot identify the cavity safely. A stud finder can help locate framing, but it is not a guarantee that an area is free of utilities.
Set the blade depth deliberately when your tool and accessory design allow it. Avoid relying only on a visual depth mark or cutting blindly through concealed spaces. For suspected utility locations, damaged wiring, or plumbing concerns, stop and contact a qualified professional.
5. Cutting with the blade unsupported
A workpiece that vibrates, flexes, or shifts turns a precise tool into a rough one. This is especially common when cutting loose trim, thin sheet material, metal brackets, or small pieces held in one hand. The blade can grab at an edge, chatter across the surface, or bend thin material instead of cutting it cleanly.
Secure the work whenever possible with clamps on a stable surface. Support the waste side of a cut so it does not tear away before the blade finishes. If you are cutting installed material, brace yourself and hold the tool with both hands when the design allows.
Never hold a small workpiece directly in front of the blade path. Keep hands and fingers clear even though the blade’s motion looks less dramatic than a spinning saw blade. Oscillating accessories can still cut skin quickly.
Use the Right Technique for the Task
Flush cuts need a stable reference surface
For trimming a door jamb before installing flooring, place a scrap piece of the new flooring and its underlayment beside the jamb as a height guide. Lay a flush-cut blade flat against that guide and use gentle pressure. Do not tilt the tool upward in an attempt to speed up the cut, since that can gouge the jamb or cut too high.
Keep the blade moving slightly during a long cut. Holding it in one spot creates heat and burn marks, particularly in painted trim or hardwood.
Sanding requires a light touch and a clean pad
Sanding attachments work well in corners and narrow spaces, but they are not designed to remove large amounts of material quickly. Using coarse paper with heavy pressure can round an edge, cut through veneer, or leave deep scratches that finer grits will not easily remove.
Start with the least aggressive grit likely to work, then progress to finer grits as needed. Replace sanding sheets when the abrasive is clogged, worn smooth, or lifting from the hook-and-loop pad. A worn sheet often makes users press harder, creating the very damage they are trying to avoid.
Check the backing pad too. If its hook surface is damaged or the pad is torn, sanding sheets may slip and the tool can mark the work unevenly. Replace worn accessories with parts approved for your specific tool.
Scraping works best at a shallow angle
A scraper blade can remove old caulk, loose adhesive, or softened paint residue, but it should slide under the material rather than chop straight into the surface. Hold the blade at a shallow angle and work in short passes. If material is firmly bonded, use an appropriate removal method rather than increasing pressure until the scraper digs into wood, drywall paper, or flooring.
Be cautious around older painted surfaces. Sanding, scraping, or cutting may create hazardous dust if lead-based paint is present. If you suspect lead paint, follow applicable safety guidance and use a qualified professional when needed. Do not use a power tool on materials that may contain asbestos.
Prevent Heat, Dust, and Accessory Failures
Heat is the warning sign DIYers ignore most often. A blade that discolors, smokes, smells unusually hot, or stops cutting efficiently needs attention. Switch off the tool, disconnect its power source or remove its battery according to the manual, and allow the accessory to cool before touching it. Do not cool a hot accessory with water unless the manufacturer specifically allows that method.
Check that the accessory is fully seated and clamped before each use. A loose blade can vibrate excessively, damage the mount, or release during operation. Also inspect for cracked sanding pads, missing teeth, bent blades, and worn carbide grit. Replace damaged accessories rather than trying to straighten, sharpen, or modify them.
Dust control matters even on small jobs. Cutting drywall, sanding filler, and removing grout can put fine dust directly in your breathing zone. Wear safety glasses and suitable respiratory protection for the material and task. Use a vacuum attachment if your tool supports one, or position a shop vacuum nearby to capture dust at the source. Clean dust from the tool’s vents with a dry brush or vacuum after use, following the manual’s maintenance instructions.
| Preview | Product | Price | |
|---|---|---|---|

| Dustopper PRO Dust Collector – 99.9% Efficiency Cyclone Dust Separator Kit | $59.98 | View on Amazon |
A Quick Pre-Cut Check
Before pulling the trigger, confirm these five points:
- The accessory is made for the material and compatible with the tool’s mounting system.
- The blade or pad is fully seated, undamaged, and securely clamped.
- The workpiece is supported, and the cut path is clear of hands, hidden utilities, and nearby finished surfaces.
- Your speed setting suits the material, with a moderate starting point when uncertain.
- You have eye protection, appropriate dust protection, and a clear stance that keeps the cord or battery tool out of the cut path.
A multi-tool is most useful when you treat it as a controlled, close-quarters cutter rather than a substitute for every saw in the shop. Slow down long enough to match the accessory to the job, establish the cut gently, and stop when the tool’s heat, sound, or vibration tells you something is wrong.
Ulverion is reader-supported. Your support allows us to research tools, create practical guides, and share reliable DIY advice for homeowners, makers, and workshop enthusiasts.