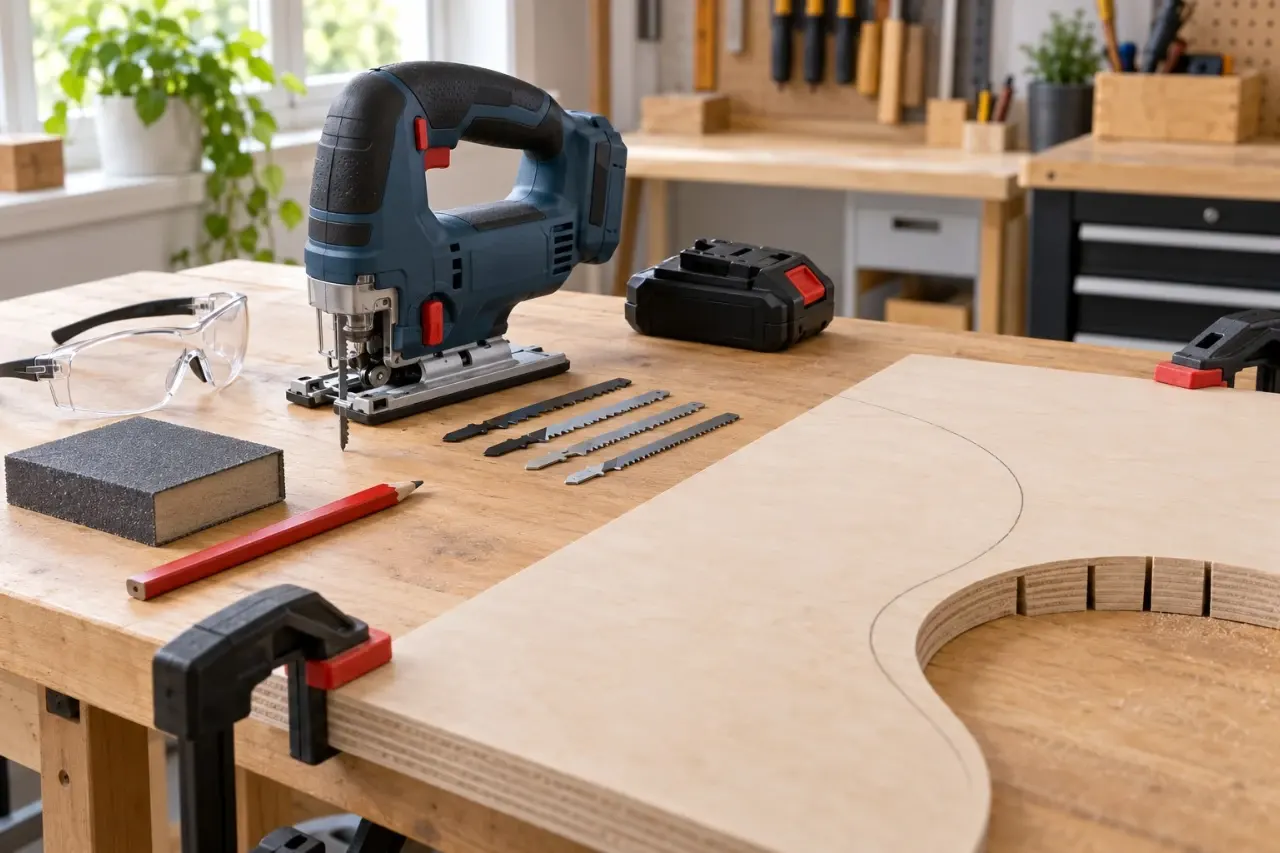
A jigsaw can cut smooth inside and outside curves when you choose a blade suited to the radius, keep the material fully supported, and guide the saw without forcing it.
The key to how to make curved cuts with a jigsaw is patience: let the blade cut at its own speed, make relief cuts where needed, and leave a small margin for sanding when the edge must look finished.
Start With the Right Blade and Setup
| Preview | Product | Price | |
|---|---|---|---|

| 50 Piece Contractor Jigsaw Blades Set with Storage Case, Assorted T-Shank Jig Saw Blades for Wood… | $19.99 | View on Amazon |
A jigsaw cuts on the upstroke, so the blade pulls upward through most materials. That motion makes the tool especially useful for cutting curves, cutouts, and shapes that a circular saw cannot follow. It also means the workpiece must be clamped well enough that it cannot bounce or vibrate.
Blade width matters more than many beginners expect. A narrow blade can turn through a tighter radius than a wide blade. A wider blade tracks straighter and is useful for gentle curves, but it may resist a small-radius turn and bend sideways if you push it.
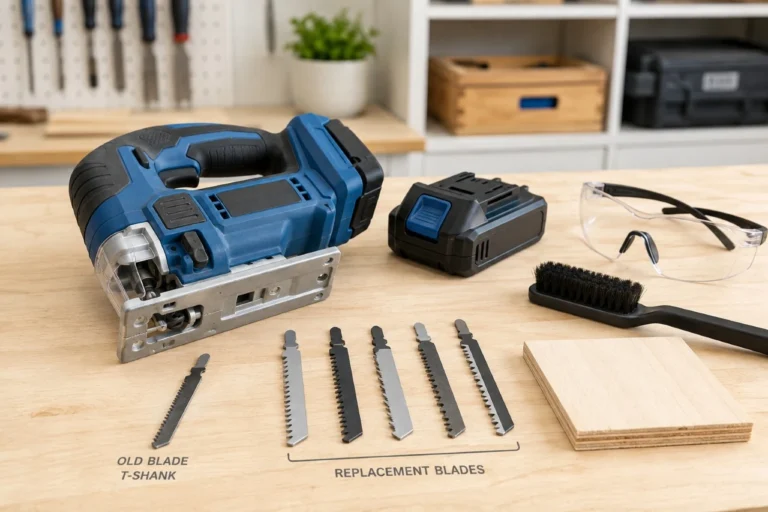
Use a sharp blade intended for the material. A dull blade heats up, wanders, and leaves a rough edge. Confirm that the blade shank matches your jigsaw’s blade clamp and that it is fully seated according to the tool manual.
| Material | Suitable blade characteristics | Practical note |
|---|---|---|
| Plywood and solid wood | Narrow wood-cutting blade with relatively coarse teeth | Use a clean-cut blade when the visible face matters. |
| Laminate or veneered plywood | Fine-tooth laminate or clean-cut blade | Apply painter’s tape over the cut line if the surface chips easily. |
| Plastic sheet | Fine-tooth blade designed for plastic | Use a slower speed to reduce melting. |
| Thin sheet metal | Fine-tooth metal-cutting blade | Support the sheet closely to limit vibration. |
For a typical curve in 3/4-inch plywood, a narrow wood blade is usually a sensible starting point. For a very tight curve, first check the blade packaging or manufacturer guidance for its recommended turning radius. Do not assume every narrow blade can make every curve.
Before cutting, inspect the jigsaw shoe, also called the base plate. It should sit flat on the work and be locked at 90 degrees unless you intentionally need a bevel cut. A loose or tilted shoe can make a curve look clean on top while producing a slanted edge underneath.
How to Make Curved Cuts With a Jigsaw Step by Step
1. Draw a clear, forgiving cut line
Mark the curve with a pencil, template, compass, flexible curve, or traced object. A thick marker line is difficult to follow precisely. Use a thin, visible line and decide before cutting which side is waste.
If the curve will be visible on furniture, trim, or a project panel, draw a second line about 1/16 inch outside the final line. Cut to the outside line, then sand or file the edge to the final shape. This approach is slower than trying to cut perfectly on the line, but it produces more consistent results.
2. Support and clamp the workpiece

- 1. The complete set includes 4pcs 6″ bar clamps,2pcs 12″ bar clamps and 2pcs 6″ spring clamps, which can meet different needs.
- 2. 6″ clamps are suitable for spreaders up to 11-9/64″ and 12″ clamps are suitable for spreaders up to 17-21/64″, which can provide customers…
- 3. Strong nylon body and high-quality hardened steel bar have good impact resistance and can fully withstand the high frequency of use at the…
- 4. Quick-change button design allows the F-Clamp to also function as a spreader. Just push the red button,remove the jaws,then reverse it and put…
- 5. With up to 150 lbs of squeeze capacity and metal ratchet construction,our pole clamps are perfect for woodworking and home repairs…

Set the workpiece on sawhorses, a workbench, or rigid foam insulation placed on a stable surface. The blade needs open space below the cut, so do not place a support directly beneath its path.
Clamp the material near the cut area, but keep clamps and supports out of the jigsaw’s travel path. Large panels need support on both sides of the cut. If the waste section drops or twists before the cut is complete, it can pinch the blade and damage the edge.
Wear safety glasses and hearing protection. Use a properly fitted dust mask or respirator when cutting materials that create fine dust, following the material and tool manufacturer instructions. Avoid cutting unknown sheet goods or materials that may contain hazardous coatings or fibers.
3. Choose speed and orbital action for control
Many jigsaws have variable speed and an orbital-action setting. Orbital action moves the blade slightly forward and back as it cuts. It can speed up cuts in wood, but it generally makes a rougher edge and reduces control on tight curves.
For a clean, tight curve in plywood or solid wood, start with low or no orbital action and a moderate speed. For a broad, rough curve in framing lumber, a higher orbital setting may be appropriate if your manual permits it. Use little or no orbital action in metal, plastic, laminate, and delicate veneer unless the tool and blade instructions state otherwise.
4. Start the cut with the shoe flat
Place the front of the shoe flat on the workpiece, with the blade clear of the edge and the cut line. Start the saw, allow it to reach cutting speed, then guide it into the material. Keep the shoe firmly against the work throughout the cut.
Hold the tool with both hands when its design allows. Keep your hands clear of the blade path below the material and away from the front of the shoe. Never reach beneath a workpiece while the battery is installed or the tool is plugged in.
5. Turn gradually instead of steering hard
Follow the line with small, steady changes in direction. Think of the blade as needing room to travel forward while it turns. If you try to pivot the saw sharply in one spot, the blade can deflect, bind, or snap.
Watch the blade and the line together. Do not watch only the top of the jigsaw housing. If the blade begins to trail outside the line, stop advancing, ease the saw back slightly along the kerf, and re-enter the curve more gradually. A kerf is the narrow slot left by the blade.
For a tight outside curve, cut in short arcs rather than one aggressive sweep. For an inside curve, relief cuts often make the job easier.
6. Use relief cuts on tight inside curves
Relief cuts are straight cuts made from the waste edge toward the curved line. They divide the waste into small pieces that can fall away as you turn. This prevents the blade from being trapped by a large wedge of material.
Make the relief cuts stop just short of the final line. Space them closer together as the curve tightens. Then cut the curve normally, allowing each small waste section to break free. This is particularly useful in thicker plywood, solid wood, and countertop material.
For a closed cutout, such as a sink-shaped opening or a handle slot, you need a starting hole large enough for the blade. Create the starter hole with the correct drill bit while the work is supported, then insert the blade only after the saw is off and unplugged or its battery is removed. Keep the hole inside the waste area so the final edge remains clean.
Common Problems and What They Mean
The cut drifts away from the line
Drift usually comes from forcing the tool, using a blade that is too wide for the radius, or allowing the workpiece to vibrate. Replace a bent or dull blade, slow your feed rate, and add support close to the cut. If the curve is too tight for the blade, make relief cuts or switch to a narrower compatible blade.
The bottom edge is rougher than the top
Some tear-out is normal because a standard jigsaw blade cuts upward. A fine-tooth or reverse-tooth blade may improve the visible surface, depending on the material and blade design. Test the blade on a scrap of the same material before cutting the project piece.
You can also place the finished face downward when using a standard up-cut blade, provided the material and layout allow it. Do not rely on this alone for expensive veneer or laminate. A test cut tells you more than a general rule. For a broader checklist on matching tools, accessories, and safe operating habits, see power tool safety basics for beginners.
The blade burns, stalls, or bends
Stop if you smell scorching, see heavy smoke, hear a strained motor, or notice the blade bending. Release the trigger and wait for the blade to stop before lifting the saw. Burning can indicate a dull blade, excessive feed pressure, incorrect speed, or a blade that is unsuitable for the material.
If the blade repeatedly binds in a cut, check whether the waste piece is closing on the kerf. Add support or change the cut sequence. Do not twist the running jigsaw to free a trapped blade.
When a Jigsaw Is Not the Right Tool
A jigsaw is versatile, but it is not always the cleanest choice. A router with a template may produce a more accurate finished curve in wood, though it requires a stable setup and appropriate router knowledge. A band saw can be easier for curved cuts in smaller wood pieces. For a large, shallow curve in a sheet good, a jigsaw still works well, but a guide-supported saw or a router template may leave less finishing work.
Avoid trying to make precise curved cuts in material that is unsupported, badly warped, or too thick for the blade and tool capacity. Follow the limits in your jigsaw manual. If a cut affects a structural component, installed countertop, finished flooring, or concealed utilities, pause and confirm the project plan before proceeding.
A clean curve usually comes from choosing a manageable blade, cutting slightly proud of the line, and sanding to the final shape. Give the blade room to turn, and the jigsaw will do what it is designed to do: make controlled cuts that straight-blade saws cannot.
Ulverion is reader-supported. Your support allows us to research tools, create practical guides, and share reliable DIY advice for homeowners, makers, and workshop enthusiasts.