Choosing masonry anchors starts with one rule: match the anchor to the base material, not just the item you want to hang. A fastener that holds securely in solid concrete may fail in hollow block, old mortar, or the face of a soft brick. For ordinary home projects, identify the wall first, then match the anchor, drill bit, hole depth, and load to the manufacturer’s instructions.
Masonry is hard, but it is not all equally strong. Concrete is generally the most predictable material for anchors. Brick can be solid, hollow, soft, or brittle depending on its age and type. Concrete masonry units, often called block or CMU, may have hollow cells that limit where some anchors can grip. Mortar joints are usually the least reliable choice for anything more than a very light attachment.
Start by identifying the masonry
Look at an unfinished edge, a utility-room wall, or a similar exposed area if possible. A poured concrete wall is continuous and solid. Brick walls have individual units separated by mortar. Concrete block has larger rectangular units and often has hollow spaces inside.
Do not assume a wall is structural concrete just because it feels hard. Thin brick veneer, stucco over block, and older brickwork require different care. If the attachment supports a railing, awning, overhead load, large storage system, or anything that could injure someone if it falls, stop and consult a qualified professional. Those jobs can involve load calculations, hidden conditions, and local code requirements.
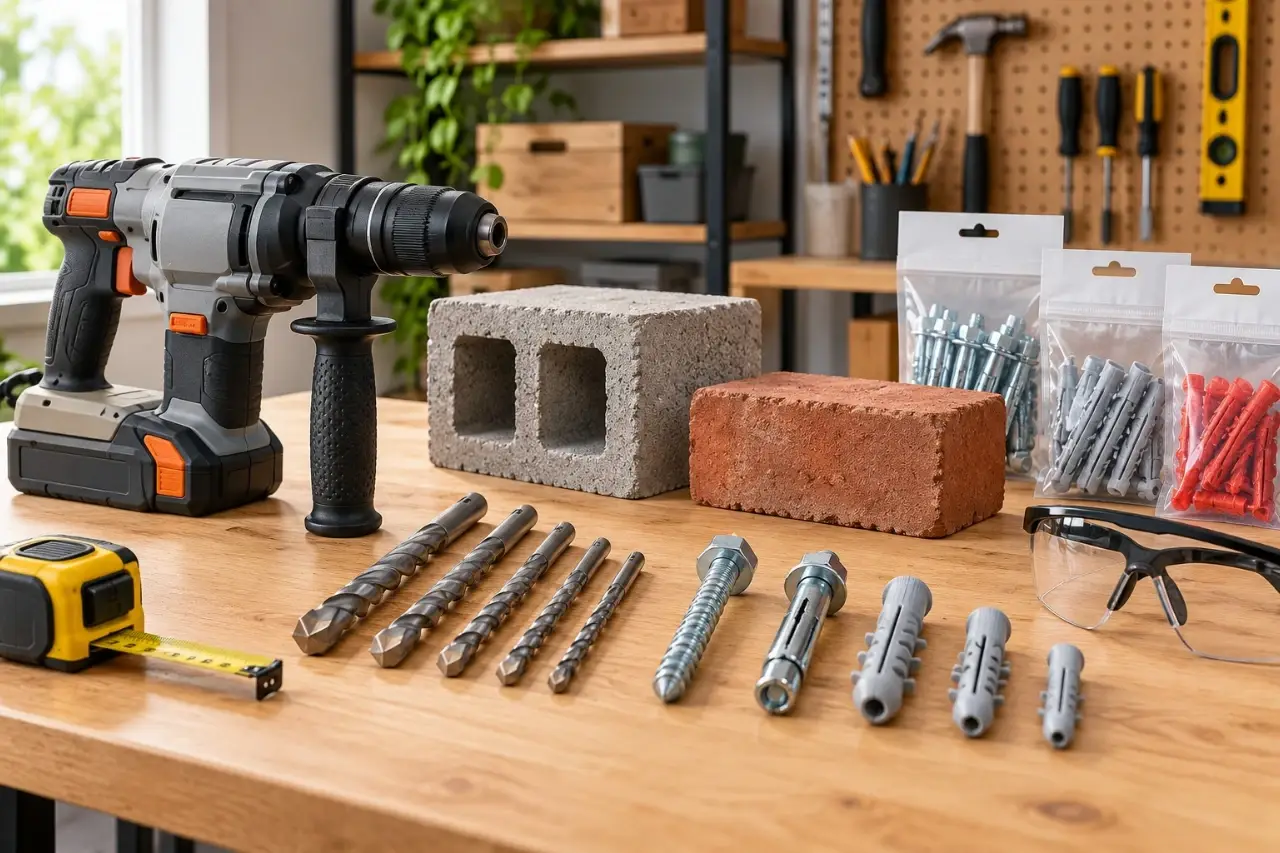
Common Types of Masonry Anchors
The right anchor depends on material condition, required holding strength, and whether the fastener may need to come out later. Ratings vary by manufacturer and depend on concrete strength, embedment depth, edge distance, spacing, and installation quality. Treat package ratings as material-specific limits, not universal promises.
| Anchor type | Usually suited to | Useful for | Important limitation |
|---|---|---|---|
| Plastic expansion anchor | Light-duty solid masonry | Small signs, light trim, cable clips | Can loosen in weak brick, mortar, or oversized holes |
| Concrete screw | Solid concrete, solid brick, some block | Brackets, wood cleats, light-to-medium fixtures | Needs the exact hole diameter and sufficient embedment |
| Sleeve anchor | Solid concrete, solid brick, some block | Through-mounted brackets and fixtures | Expansion can crack weak masonry or distort thin material |
| Wedge anchor | Sound, solid concrete | Heavier fixed attachments | Not intended for hollow block or weak brick; requires proper edge distance |
| Toggle-style hollow-wall anchor rated for masonry | Hollow block cells, where approved | Light fixtures in hollow areas | Must be specifically rated and installed for the wall condition |
Plastic expansion anchors
A plastic anchor expands as a screw enters it. It is a reasonable choice for light items where a failure would not create a hazard. The drilled hole must match the anchor diameter closely. A loose hole lets the anchor spin or pull out instead of expanding.
These anchors are not a good answer for heavy shelves, grab bars, overhead items, or a wall-mounted television. They are also unreliable in crumbling mortar and soft, deteriorated brick.
Concrete screws
Concrete screws cut threads into a precisely drilled pilot hole. They are useful because the screw can often be removed later, which helps when adjusting a bracket or replacing a fixture. Use the required masonry bit diameter, clean the hole thoroughly, and avoid overtightening. If the threads strip, moving up one screw size is not automatically safe unless the manufacturer permits it.
Expansion anchors for solid concrete
Sleeve and wedge anchors work by expanding against the sides of the hole. They can provide strong holding power in sound, solid concrete, but they create outward pressure. That pressure is why they are a poor choice near a concrete edge, in cracked or fragile masonry, and in hollow block unless the anchor manufacturer specifically approves that use.
For home projects, a concrete screw is often easier to install and remove. An expansion anchor may make more sense when a fixture has a predrilled hole and needs a permanent, through-mounted connection in solid concrete.
How to choose an anchor before drilling
Think through four questions before picking up the drill. What is the wall made of? How much does the item weigh once loaded? Will pulling, vibration, or leverage act on it? And what happens if it comes loose?
A small house-number plaque creates little leverage. A shelf bracket creates much more because its load sits away from the wall. A bike hook, hose reel, or folding work surface can apply repeated pulling forces that are much greater than the object’s empty weight.
For a light-duty project on solid concrete or sound brick, a properly sized plastic anchor or concrete screw may be suitable. For a bracket or moderately loaded fixture, use an anchor type and fastener diameter approved for that material and application. For safety-critical, overhead, structural, or high-load work, get project-specific advice from a qualified professional.
Avoid anchoring into mortar whenever a sound brick or concrete area is available. Mortar can be convenient to drill, but it commonly erodes and varies greatly in strength. Drilling into the brick face also requires care: stay well away from edges to reduce the chance of splitting the brick.
| Preview | Product | Price | |
|---|---|---|---|

| DEWALT 20V MAX Cordless Drill and Impact Driver, Power Tool Combo Kit , Includes 2 Batteries… |
$239.00
$149.00 | View on Amazon |
How to Install Masonry Anchors Correctly
A masonry anchor is only as reliable as its hole. Rushing this step is the most common reason an otherwise suitable anchor fails.
- Mark the location and check the surroundings. Confirm the fixture is level and use its mounting holes as the template when possible. Be alert for nearby pipes, conduit, electrical boxes, and other concealed services. Do not drill where you cannot reasonably assess what may be behind the surface.
- Use the specified masonry bit. Carbide-tipped masonry bits are designed for brick, block, and concrete. Match the bit diameter to the anchor instructions, not the screw shank by eye. A hammer drill makes holes in hard concrete faster, but it can damage brittle brick or weak mortar. Start carefully and use hammer action only when the material and tool manual support it.
- Set the correct depth. Wrap tape around the bit as a depth marker, allowing for the required anchor depth plus room for drilling dust at the bottom. Do not drill blindly through a masonry wall. Wall thickness and the material behind it may be unknown.
- Drill straight and clear the dust. Keep the bit perpendicular to the surface unless the fixture instructions say otherwise. Withdraw the bit periodically to clear dust. Then vacuum the hole or use a bulb blower. Dust left in the hole can prevent a concrete screw from cutting full threads and can interfere with some expansion anchors.
- Install the anchor without forcing it. A plastic anchor should fit snugly and sit flush with the surface. Tap it gently with a hammer if needed. If it drops in easily, the hole is probably too large. With concrete screws, drive slowly enough to feel the threads engage. With expansion anchors, follow the specified tightening method and do not exceed the recommended torque.
- Mount the fixture and test it gradually. Tighten fasteners until the fixture is secure and flush, but do not crush wood, bend thin brackets, or spin the anchor. Apply light hand pressure first. For shelves and similar items, add weight gradually rather than loading them all at once.


Common problems and what they mean
If the bit stops suddenly, you may have reached hard aggregate, rebar, metal lath, or another embedded material. Do not force the drill. For a noncritical project, relocating the hole may be the sensible option. Drilling into reinforcing steel or unknown metal can create problems that a simple anchor change will not solve.
If a plastic anchor spins, remove it if possible and assess the hole. A larger anchor may be appropriate only if its instructions call for a larger hole and the masonry is still sound. Do not fill a failed hole with glue, matchsticks, or random material and treat it as a rated repair.
If a concrete screw will not drive fully, the hole may be too shallow, too narrow, or packed with dust. Remove the screw, clean and verify the hole, and inspect the screw threads. Repeatedly forcing the same screw can wear its cutting threads.
Cracked brick, crumbling mortar, or concrete that breaks out around the hole are stop-work signs. Move the attachment to sound material or ask a qualified professional to evaluate the wall. Adding a bigger anchor to damaged masonry often makes the damage worse.
Safe Drilling Habits for Masonry
Wear safety glasses and hearing protection. Masonry drilling produces sharp chips and substantial noise, especially with hammer action. Use a dust mask or respirator appropriate for mineral dust, and capture dust with a vacuum when practical. Silica-containing dust from concrete, mortar, and many masonry products should not be allowed to build up in an enclosed work area.
Use a stable stance and a properly supported workpiece or ladder setup. Never hold a fixture in place with one hand while drilling through it with the other if you cannot maintain control. Follow the drill, bit, anchor, and fixture manufacturers’ instructions, since required hole sizes and installation methods differ.
A properly drilled, clean hole in sound masonry is more valuable than choosing a larger anchor after a poor installation. When the wall material or load is uncertain, reduce the risk by pausing before drilling and choosing a mounting method that the material can truly support.


Ulverion is reader-supported. Your support allows us to research tools, create practical guides, and share reliable DIY advice for homeowners, makers, and workshop enthusiasts.