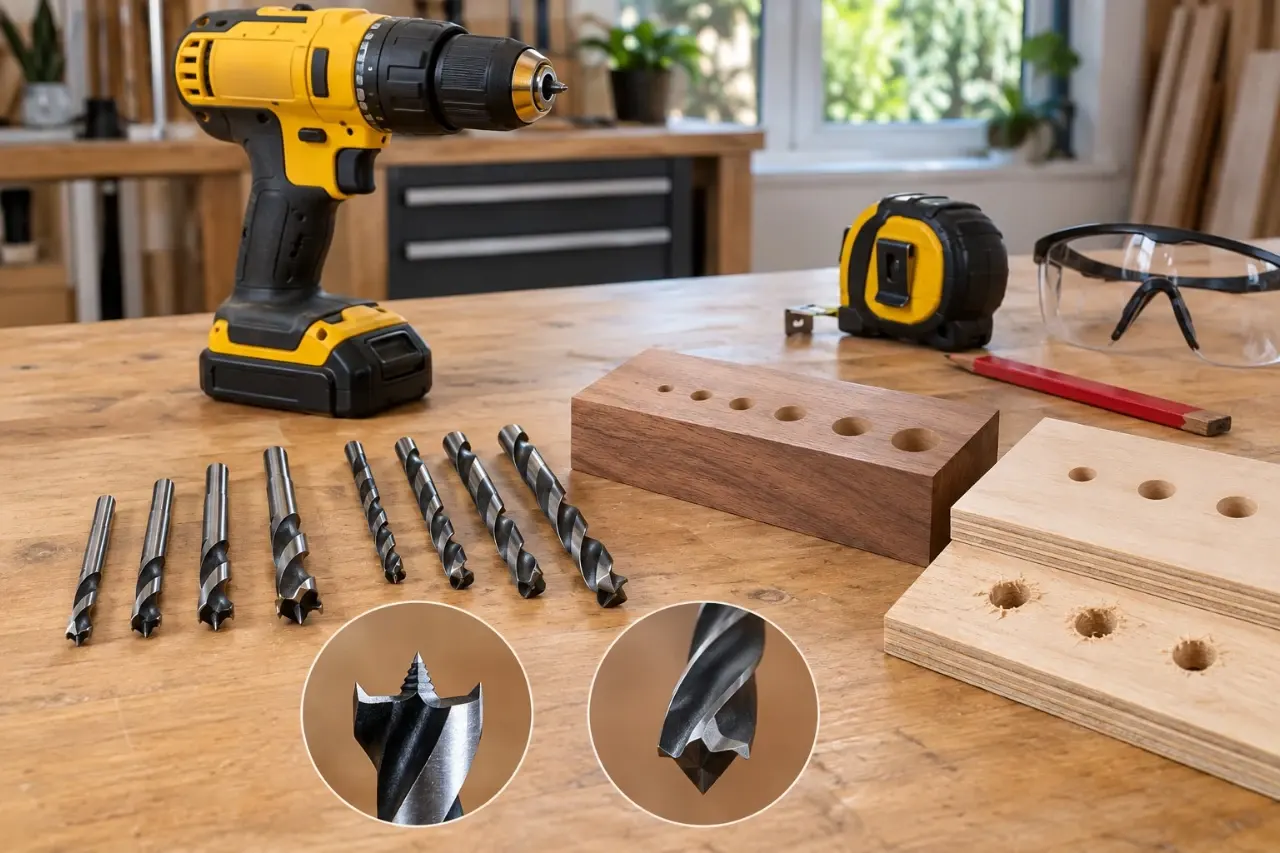
A brad point bit is usually the better choice for clean, accurately placed holes in wood when hole location and edge quality matter. Its sharp center point keeps the bit from wandering, while cutting spurs score the hole’s edge before the bit removes material. A twist bit is more versatile and can drill wood, plastic, and many metals, but it is more likely to skate across wood and leave a rougher rim.
That does not make twist bits a poor choice for wood. For rough framing, concealed holes, or a job where you are switching between materials, a standard twist bit can be perfectly practical. The right choice depends on the material, how visible the hole will be, and how much placement accuracy matters.
Brad Point vs Twist Bit at a Glance
| Feature | Brad point bit | Twist bit |
|---|---|---|
| Center design | Pointed tip centers the hole | Chisel-shaped cutting edge at the tip |
| Main use | Clean holes in wood and wood-based panels | General drilling in wood, plastic, and metal |
| Starting accuracy | Excellent | Fair without a starter mark |
| Hole edge in wood | Usually clean | Can tear or chip fibers |
| Metal drilling | Not intended for it | Common choice when bit material is suitable |
| Common limitation | Less versatile across materials | More likely to wander and tear out wood |
A brad point bit has three working features at its tip. The center brad establishes the hole location. Two sharp outer spurs cut the wood fibers around the circumference. The cutting edges between them lift out the waste. This sequence is why the bit leaves a crisp rim, especially on face frames, cabinetry, shelving, and other visible work.
A twist bit has spiral flutes that carry chips out of the hole, plus a conventional cutting tip designed for broader material use rather than specialized wood positioning. The tip does not locate itself as precisely on wood. If the drill starts at an angle or the surface is hard and slick, the bit can move slightly before it bites.
When to Use a Brad Point Bit
Choose a brad point bit when the hole must start exactly on a mark or look clean on the finished face of wood. It is especially useful for drilling dowel holes, shelf-pin holes, pilot holes in hardwood, and holes for visible hardware.
Brad point bits also help with plywood, MDF, melamine-coated board, and veneered panels, although no bit can eliminate every chip-out problem. Thin veneers and brittle coatings need careful support and a controlled exit strategy.
Use a brad point bit for softwood or hardwood when you need to:
- Start precisely on a layout mark without the bit skating
- Drill a clean entry hole for a screw, bolt, or hardware fastener
- Make repeated holes for dowels, pegs, or shelf supports
- Reduce splintering on a visible wood surface
The bit should be sharp and clean. Resin buildup, dull spurs, or bent shanks can turn a normally clean-cutting bit into one that burns or tears fibers.


Limits of brad point bits
A brad point bit is a wood-cutting accessory. Do not use it as a substitute for a properly rated metal-drilling bit. The delicate center point and outer spurs are not designed for steel or other metals, and they can be damaged by the attempt.
They can also clog in deep holes, particularly in damp lumber or resinous softwood. Withdraw the bit periodically to clear chips and reduce heat buildup. Follow the drill and bit manufacturer’s instructions for the correct operating method. For a deep, straight hole, work in stages rather than forcing the bit to full depth in one push.
When a Twist Bit Makes More Sense
Use a twist bit when versatility matters more than finish quality. A standard twist bit is a sensible option for a rough hole in framing lumber, a concealed hole behind hardware, plastic, or many metal tasks when the bit’s material and manufacturer guidance match the workpiece.
Twist bits are also common for pilot holes. In wood, a pilot hole reduces the chance of splitting and makes driving a screw easier. If the pilot hole will be hidden, the slightly rougher entry edge from a twist bit may not matter.
For metal, use a bit specifically marked and intended for metal drilling. Always follow the bit manufacturer’s material recommendations. Secure the work, use an appropriate drill speed for the metal and bit size, and use cutting fluid only when the tool and bit manufacturer allow it. A brad point bit is not the alternative here.
Improve a twist bit’s accuracy in wood
A small indentation gives a twist bit a place to start. Mark the location, then use an awl or a nail set to make a shallow dimple. This is particularly helpful on hardwood, painted surfaces, and angled stock.
Keep the drill square to the surface and start at a controlled speed. Once the flutes begin cutting, bring the drill up to a suitable speed without pushing hard. Excess pressure does not make a dull bit cut properly. It often creates heat, enlarges the hole, or causes a sudden breakthrough.
How to Drill a Clean Hole in Wood
Bit choice matters, but technique decides much of the final result. These steps work for either bit, with brad point bits giving you a better starting advantage.
- Mark the hole center clearly. Use a pencil mark or an awl mark. Confirm the location before drilling, especially near board edges where a misplaced hole can weaken the workpiece.
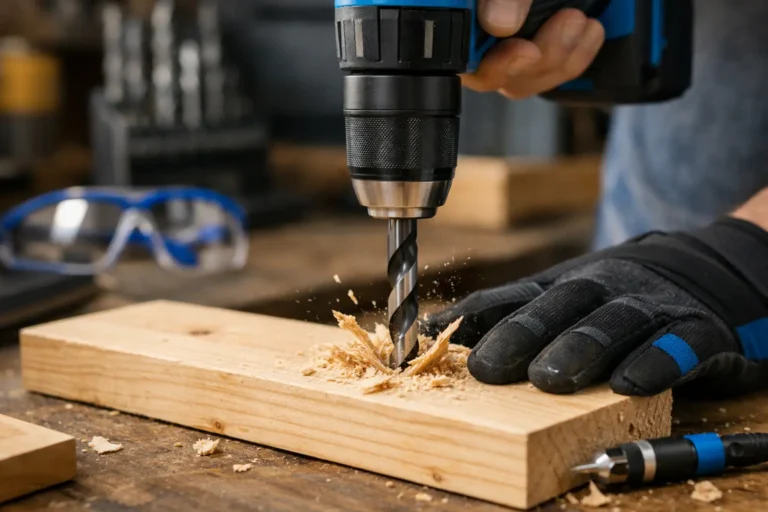
- Support the wood. Clamp the board to a stable surface. Never hold a small workpiece in one hand while drilling it with the other. Place scrap wood beneath through-holes to support the fibers as the bit exits.
- Set the depth. For a blind hole, wrap tape around the bit as a visual depth marker or use the drill’s depth stop if it has one. The tape is a reference, not a precision stop, so slow down as you approach it.
- Start square and controlled. Hold the drill perpendicular to the face unless the project calls for an angled hole. Begin slowly enough to confirm the bit is centered.
- Clear chips during deep drilling. Back the bit out periodically to prevent packed chips from creating heat and friction. Let the bit cool if it becomes hot.
- Ease pressure at breakthrough. When drilling through the board, reduce feed pressure near the far face. A backing board greatly reduces exit tear-out.
For very clean holes in thin veneer or laminate, drill just enough to establish the rim, then complete the hole with light, steady pressure and backing support. Test the method on an offcut first when the finished piece cannot be replaced easily.
Hole Quality Depends on More Than the Bit
A brad point bit can still leave a poor hole if it is dull, clogged, or used carelessly. Likewise, a sharp twist bit can produce acceptable results in ordinary pine when the hole is not visible.
The species and condition of the wood matter. Soft pine can crush or fuzz around a hole. Dense hardwood can burn if the bit is dull or the drill speed is too high. Plywood can chip at the exit face because alternating veneer grain resists cutting differently. MDF generally drills cleanly but produces fine dust, so use dust collection where practical and wear appropriate eye and respiratory protection.
Bit diameter changes the result as well. Small bits are easier to break if they bind or flex. Larger bits remove more material and require more torque. If your drill stalls, stop rather than twisting the tool harder. Check whether the bit is dull, packed with chips, too large for the drill’s capability, or encountering a hidden fastener.
Common Problems and What They Mean
The bit walks away from the mark
This is most common with a twist bit. Make a starter dimple, begin at lower speed, and keep the drill square. If exact placement matters, switch to a brad point bit for wood.
The hole has fuzzy or chipped edges
The bit may be dull, or the wood fibers may be unsupported. Use a sharp brad point bit for visible wood holes, clamp a backing board underneath, and reduce pressure as the bit exits.
The wood scorches
Burning usually means excessive heat from a dull bit, packed chips, too much speed, or too little chip clearing. Stop drilling, let the bit cool, clean it, and inspect the cutting edges. Replace or have the bit professionally sharpened if it no longer cuts cleanly.
The drill catches and twists suddenly
A bit may have broken through, hit a knot, or bound in chips. Release the trigger, keep both hands on the drill when practical, and wait for the bit to stop before repositioning. Check the workpiece for nails, screws, or other hidden hardware before continuing.
Basic Drilling Safety
Wear safety glasses whenever you drill. Clamp the workpiece, keep loose clothing and hair away from the rotating bit, and remove gloves before operating a drill because gloves can catch in rotating accessories. Check that the bit is fully seated and tightened in the chuck according to the drill manual.
Before drilling into a wall, ceiling, or floor, confirm what may be behind the surface. Hidden wiring, plumbing, ducts, and structural components change the task. Stop if you cannot identify a safe drilling location or if you encounter unexpected resistance.
For most clean wood holes, start with a sharp brad point bit and a backing board. Reach for a twist bit when the material changes or the hole is rough, hidden, or part of a general-purpose task. Matching the bit to the work lets your drill do less fighting and your project show fewer mistakes.
Ulverion is reader-supported. Your support allows us to research tools, create practical guides, and share reliable DIY advice for homeowners, makers, and workshop enthusiasts.